If youve ever tried capturing fast moving sports action with your digital camera, you may have ended up frustrated and confused about why the pictures didnt turn out so hot. There are some common mistakes beginner photographers make when shooting sports, and its not overly easy for many professionals to do either, but dont despair. There are several tips that might help you get better sports action shots in the future.
The first thing you need to realize is: Not all of your pictures will turn out just right. I was recently at my sons high school football game, and took over 400 pictures before the third quarter was finished. Of those 400 though, only about 40 were exellent, and roughly 75-100 were good enough to keep.
Thankfully that is one of the beauties of using digital cameras: You dont have to waste expensive film while youre learning. Instead, when you come across any pictures that didnt turn out well, you can simply delete them to make room for new ones.
With that said, lets get in to some useful tips.
Because sports photography is quite fast paced, youll need to start with a lot of light. If youre trying to take pictures of an indoor basketball or volleyball game, you may have problems getting good pictures. If you have a very strong flash for your camera, that will help quite a bit. Many point and shoot digital cameras dont have strong enough flash for this, especially when parents tend to try taking the pictures from the stands which are a bit too far away from all the action.
So try getting closer. See if youre able to stand at the edge of the court, or maybe right behind the basket if youre at a basketball game. Then set your camera on sports mode - this will look like a little running man icon on a control dial of your camera - and make sure your flash is turned on. These settings will help your camera give you the best settings it can in your currently lighting conditions, and if all goes well youll get some great action shots in the end.
If youre taking action shots outside, things are much easier... particularly if theres bright sunlight. The more light you have available when taking your pictures, the better youll be able to stop the action in your pictures.
Again put your camera into sports mode, and again try to get as close to the action as you can. Position yourself behind the goal posts at a soccer or football game, or close to one of the sides if thats the best you can do. Just pick one spot and wait for the play to come your way. There will be times where all the action is too far away from you, but wait a little while and it usually comes close to every part of the playing field.
Even if you have bright sunlight to shoot in, you can still use your cameras flash too. Keep in mind that it might not be strong enough to reach too far, and if thats the case it wont do you much good. If however, you get to take a picture of a tackle taking place 5 feet in front of you, the flash will usually be able to light the scene at that distance.
If you know how to use your camera in manual or semi-manual mode, youll want to control the shutter speeds in order to catch the action in sports. A shutter speed of at least 1/500 or higher usually does the trick nicely.
About the author: © 2006, Kathy Burns-Millyard.
Our Lifestyle is everything. Change: Learn, Adapt And Evolve Or Be Left Behind
Wednesday, February 20, 2008
Holiday Photography Ideas
The holiday season has arrived and cant we all feel the spirit of the season start to set in. All around us seems to be festive music, smiling people, and shopping bags galore! Sending gifts, holiday parties, and maybe a snow shower fill our thoughts this time of year. In very short time family and friends will be celebrating together with smiling faces for everyone.
Everything about the season presents fantastic scenery for photographers. Whether you are a professional or simply a fan of the point and shoot, the holidays offer up many great opportunities to capture family memories on film. Because you dont ever want to forget some of the wonderful experiences of this season it is important to be prepared to capture the moments when they happen.
Here are some tips to keep in mind before it is too late.
It seems more and more people are switching to digital cameras these days, and why not, they offer so many advantages for the typical photographer. Before the holidays arrive make sure to prepare your camera a bit. This doesn't take too much work but sure will be helpful come picture time. First and foremost you want to clear out the cameras memory cards so there is maximum storage capacity available. The best way to do this is to plug your camera in and transfer any older photos to your computer. The next preparatory step is to charge your camera. There is nothing like running out of batteries in the middle of something special. If your camera uses regular batteries try to stock up on a few extras just in case.
The next tip for holiday photographers concerns the composition of each picture. The holidays offer really great scenery that should be captured. Try placing your subject off center in the picture to more creatively display the local scenery. Many pictures with the subject directly in the center lose the colorful surroundings that would otherwise complement the picture nicely.
When you are taking pictures of an event, such as children opening their gifts on Christmas morning, remember to take lots of pictures and wait until later to choose which ones are worth saving. Digital cameras are especially useful for this technique because they have large capacities that can easily be edited later. You want to take a lot of pictures to ensure you catch everything going on; why risk missing something special if you have the capacity? This technique is also helpful when trying to capture the family together. There is always one in the crowd that smiles at the wrong time or just plain looks silly. The more photos you snap the more likely one is going to be a good representation of everyone involved.
The bright lights displayed during the holidays present a great chance for some creative photography too. Instead of taking the same old photo of the house decorations try something new. If possible on your camera, try leaving the shutter open for an extended period of time. During this brief half- to four-second pause you can nudge the camera a bit to add extra effect. The result should be unique pictures of the lights with a slight blur effect. Try experimenting a bit to create the exact photo you are looking for. You can also try this with decorative candles.
The opportunities for photographing during the holidays are endless. Everywhere we look there are fantastic photos waiting to be taken. Make sure to be prepared because once the scene has passed its too late and we would hate to miss some of those wonderful memories that the holidays offer.
About the author: Don Packer is the designated photographer for all his family gatherings. That way at least one person is capturing the family history and fun times.
Ярлыки:
Holiday,
holidays,
Photography,
photography ideas,
Photography Tips
Fashion Photography
Are you someone who likes to mingle with celebrities? Do you like to take their photographs as well? If the above is true then fashion photography can be your career path. As a fashion photographer, you will be taking pictures of models and celebrities and portraits. To be successful in this kind of photography, you need to have a keen sense of marketing. You should be able to sell a pose, a face and even a feeling. We are talking about a very competitive world where it is not going to be easy to get noticed because most of the magazines and agencies prefer working with photographers with reputation or who can deliver the best shot.
This doesn't mean that you should not aspire to be a fashion photographer. It means that you will have to work harder to get your work published, recognized and accepted. It is always a good idea to start by getting some exposure through working in small agencies and work with lesser known models and then slowly create a portfolio that can always be enhanced. You will have to create a reputation of being a professional and creative shooter and this is one of the key factors. As a fashion photographer, you should know about studio lighting, design setting and shooting in a controlled environment. You may have to get involved in direction and work with your crew to help them with lights, make-up and backgrounds. This needs you to be aware as a person and knowledgeable as a photographer.
Working with models can be quite a challenging job and the most important part lies in setting the mood for your models. You can overcome this obstacle through effective communication and patience. So in a nutshell, fashion photography is not just about photography but also requires you to be able to interact and communicate with people.
The basic skills of photography are all the same. You need to have knowledge and should be able to understand camera operation, composition, lighting, darkroom procedures, and the properties of different types of camera films. As a photographer, you will have to use different combinations of cameras, films, lenses, filters, and lighting to produce an effect, and a final picture. Different types of photography like nature, wildlife, wedding, portrait and fashion have their specific requirements and understanding of the subject.
In fashion photography, the subject usually is a model. The position of the camera is important for shooting a good picture. If you are planning to shoot a full body photo of any model, then the shot needs to be taken from a relatively low camera height, which should not exceed the photographers hips. The ever popular head shot or head and shoulders portrait has to be taken from slightly above the eye level of the model. This height will bring out well defined facial features but if you dont maintain the right level then your photograph will have a distorted view. But the best pictures can be taken if you shoot from below eye level and that is how most world leaders are photographed. This level will make your subject look taller and dominant.
About the author: Seth Willis is the webmaster for http://www.starephotography.com/ he enjoys photography as well as painting and blues and Jazz guitar.Stare photography is an Online school for budding and seasoned photographers to enhance their skills or start a new career.
"Pierre Balmain Models"


"Elian Saab Models"


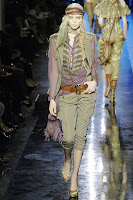
"Jean Paul Gaultier Models"


This doesn't mean that you should not aspire to be a fashion photographer. It means that you will have to work harder to get your work published, recognized and accepted. It is always a good idea to start by getting some exposure through working in small agencies and work with lesser known models and then slowly create a portfolio that can always be enhanced. You will have to create a reputation of being a professional and creative shooter and this is one of the key factors. As a fashion photographer, you should know about studio lighting, design setting and shooting in a controlled environment. You may have to get involved in direction and work with your crew to help them with lights, make-up and backgrounds. This needs you to be aware as a person and knowledgeable as a photographer.
Working with models can be quite a challenging job and the most important part lies in setting the mood for your models. You can overcome this obstacle through effective communication and patience. So in a nutshell, fashion photography is not just about photography but also requires you to be able to interact and communicate with people.
The basic skills of photography are all the same. You need to have knowledge and should be able to understand camera operation, composition, lighting, darkroom procedures, and the properties of different types of camera films. As a photographer, you will have to use different combinations of cameras, films, lenses, filters, and lighting to produce an effect, and a final picture. Different types of photography like nature, wildlife, wedding, portrait and fashion have their specific requirements and understanding of the subject.
In fashion photography, the subject usually is a model. The position of the camera is important for shooting a good picture. If you are planning to shoot a full body photo of any model, then the shot needs to be taken from a relatively low camera height, which should not exceed the photographers hips. The ever popular head shot or head and shoulders portrait has to be taken from slightly above the eye level of the model. This height will bring out well defined facial features but if you dont maintain the right level then your photograph will have a distorted view. But the best pictures can be taken if you shoot from below eye level and that is how most world leaders are photographed. This level will make your subject look taller and dominant.
About the author: Seth Willis is the webmaster for http://www.starephotography.com/ he enjoys photography as well as painting and blues and Jazz guitar.Stare photography is an Online school for budding and seasoned photographers to enhance their skills or start a new career.
"Pierre Balmain Models"


"Elian Saab Models"


"Jean Paul Gaultier Models"


Photography competitions
Learn the art of winning photography competitions.Whether you are new to photography or a glowing professional, photography competitions are well worth considering. In order to increase your winning chances, you must first understand that what you consider to be the best image is not always reflected in the final result. This may sound ambiguous to some but certain requirements must be adhered to.
To be successful entering and winning photography competitions one must first understand what the judges and the companies holding these event require. Companies usually have strict guidelines telling photographers what sort of image they are looking for. Most companies will use the winning image as promotional material for their business, so submitting images that dont meet their guidelines will certainly not be ranked.
Travel companies will be looking for an image that they can use on their brochure - so before you enter in any competition it is well worth while to take a close look at the company and the images they normally use.
Regardless of the type of image entered, photographers must submit images that are technical perfect, with good composition and proper exposure. Submitting poor quality images will waste your time along with the judges.
One of the utmost moments in any photographers career is to see his/her images displayed in the winners section of a website or newspaper or at a prize winners ceremony. This is a moment when a struggling photographers business may start to take off or give his studio an extra boost. It is also when the value of a photographers images rises.
But to win a photography competition, the right approach is very important.
Your image should hold a theme that will suit the company holding the competition. If the company is travel related they will be looking for an image that has vibrant colours; an image that has life and soul. Energy companies will want an image that will blend their industry and the environment together.
When entering a competition there will be hundreds, if not thousands of photographers with entries. To give yourself the best possible chance of winning, only submit images that you think will have a decent chance. The image that you enter should have impact and must be a photograph that you are proud of - an image that you are constantly showing off to your friends and family.
Prizes on offer vary and can range from cash to equipment. Some of the larger competitions pay out tens of thousands of dollars. Competitions that are free to enter will have smaller prizes but are still worth entering.
One thing you should remember is that some companies hold competitions to get free images. Before submitting your pictures, read the guidelines. Make sure that you will be able to sell the image after the competition and that you are not signing away the copyright of your image. If you are unsure about it and the guidelines are not clear, it is best not to enter.
There are thousands of competitions held all over the world each year. To find out which ones suit your photography contact your local camera club, or look up some of the photography directories on the web. Some of the larger competitions that are open to photographers world wide will charge a submission fee, but there are a wide selection of free competitions out there.
If you are new to photography or unsure about your chances of success its best to try a few free ones at the beginning.
Photography competitions can do so much for a photographers career - some say its the taking part that counts - but when the winner receives so much free advertising for their business, plus the large amounts of cash on offer; I think they are worth taking seriously.
About the author: TJ Tierney is an award winning photographer and a freelance writer.
Ярлыки:
competitions,
images,
Photography competitions,
winning
Tuesday, February 19, 2008
Digital Photography - File Size Matters
Digital Photography: File Size Matters
Are you just starting out using a digital camera? Did you just get your first digital camera over the holidays? Are you unsure of how to take the best photographs with it? Here's one tip that may help end up with better results - set the file size setting on your camera to the largest file size possible.
With most digital cameras, you have a choice of what size files you want to save your images as. The larger the files - the fewer files you can fit on your storage media (compact flash, smart media, etc). So the temptation is to set you files as small as possible, so you can fit more images on your camera before you download. For example, on my Nikon Coolpix 775 (set on minimal compression) with a 128 MB compact flash - I can fit 780 of the smallest file size on the card, 318 of the medium size and only 133 of the largest size. The largest images on my Coolpix are 1600 X 1200 pixels - or a 650-700 KB JPEG file. The smallest images are 640 X 480 pixels - or about 130 KB JPEG file.
The reason you want larger files is that it gives you more options down the road in editing and printing your images. If you need to crop out parts of your image - you'll end up with a smaller file. And the size of your file, determines how large of a print you can make.
With the large files on the Coolpix 775 - I've printed images as large as 11 X 14 inches. This happened to be an image that filled the frame - so I didn't have to do any cropping. If I had tried to print larger than 11 X 14 - the image wouldn't have looked very good. Usually, even with some cropping of the image, the 650 KB JPEG files from the Coolpix can easily be printed in an 8 X 10 size.
The small files from the Coolpix 775 are a completely different story. A full frame image of one of these files will look good only up to about a 4 X 6 inch print. If we do any cropping of the file, it's hard to get a good print any larger than 3 X 5 inches.
So imagine you take a fantastic photograph that you really want to hang on your walls. Let's also assume you have to do a little cropping to get the framing of the image just right. If you've set your camera to create the largest files possible - you will likely have a lovely 8 X 10 inch print to frame and hang on your walls. If you've set your camera on the smallest file size - that same picture will only be 3 X 5 inches. Which would you rather display on your walls.
So remember - set your digital camera to create the largest files it can make. You'll be much happier with the prints you can create if you have bigger files. The downside is you will need to download your photos more frequently, but even with our Coolpix 775 at its highest resolution, we can get almost as many photos as 4 36-exposure rolls of film.
Copyright by Patty Hankins & Bill Lawrence 2003
10 Easy Ways To Improve Your Family Photographs
1. Get to know your camera. Half an hour spent reading the instruction book and getting to know what your camera can do, really will be time well spent. Practice using the camera without film until you feel confident with the controls. Practice holding the camera very firmly when pressing the shutter, as any movement will result in a blurred picture. Tucking your arms tightly into your body helps to avoid this. Or look around for something to support the camera. A wall, a ledge, seat or tree branch would be ideal.
2. Get in close. Fill the viewfinder with your subject and you are sure to improve your pictures. A telephoto or zoom lens is obviously the easiest way to do this but even with a compact camera you can usually get much closer than you think. Consult your instruction book. Getting down to your child's level will make this easier and and improve the shot too.
3. Look carefully at the background. We've all seen photographs of people with lamp posts or telegraph poles growing out of their heads, but it's the less obvious background muddles that often ruin pictures. The washing on the line in the garden or clutter on the sofa or table. Change your position if you cannot change the child's.
4. Turn the camera round. Taking the picture with your camera in the vertical position can be an easy way to cut out a lot of unnecessary background and give you more of the child in the shot. If using your camera this way up feels strange, practice without film until it feels comfortable. Using your camera in this position avoids a lot of cut off heads and feet too.
5. Photograph children in their natural environment. Pictures taken in their bedrooms surrounded by toys, crawling out of their den in the garden or hanging from
the climbing frame in the park are much more likely to be successful than formally posed shots in their best clothes perched on the edge of the sofa. Photograph them when they're grubby and scruffy as well as in their Sunday best.
6. Become invisible. The very best natural, unposed pictures will be taken when your child is totally unaware of your existence. This can be acheived by the use of a telephoto or zoom lens or just by being so quiet that they forget about you. If this is impossible, the other trick is to talk to them about what they are doing, thus turning their attention back to the activity and away from the camera. If you feel that flash lights will frighten your baby or distract your child, use a fast film, 400 or higher, and you should be able to take photographs indoors in a fairly bright room without flash. Side lighting from a window can be effective but don't place your children directly in front of a window or their faces will be in shadow.
7. Sea, sand and sky. Is their anything more depressing than getting back the prints of your family on that paradise beach to find them all pictured as black silhouettes against a perfectly exposed sky? This happens because the large amount of back light tricks the camera's exposure meter into thinking that the whole scene is receiving lots of light, but as we have seen, faces are in shadow. The only way to correct
this is to use fill in flash to lighten the shadows, or a large piece of white card, held just out of shot, to reflect light back on to the faces. Check your instruction book again as some cameras have a back light compensation switch especially to help solve this problem. Avoid shooting at midday as this is when the shadows will be harshest. Try to move your child so that the light falls from the side if possible.
8. Dressing up. Having a few props ready can make for a fun session. Hats are a favourite with children, but shawls, flowers, baskets and dressing up clothes as well as toys and teddies will all help you compose interesting pictures, especially when children do the unexpected with them! Don't necessarily go for a smile on every shot, try to capture a whole range of expressions.
9. Sports and action shots. There are two ways of photographing action. The first is to use a high shutter speed which, like flash, will effectively freeze the motion,
giving a sharp picture but losing the sense of movement. The second method is panning, or following the child with the camera. Focus on the spot where your child will be arriving and follow the action with the camera, pressing the shutter very smoothly and keeping the pan going for a few seconds afterwards. This results in a sharp picture of your child but with a streaked background giving a much better feel of the action. Remember it is easier to photograph motion that is coming towards you than passing by in front.
10. Collecting your prints from the processor need not be the end of the story. Why not have your prints enlarged so that you can hang them on the wall and enjoy them
every day. Or scan them into your computer and set them as wallpaper or make them into screensavers. If there is a problem with Aunt Sally's slippers in the left hand
corner, many processing houses offer selective enlargements where they will just enlarge the part you want. It is also possible to have your photographs printed on to a paper that gives the look of a painting on canvas, or you can have pictures made into posters, puzzles, table mats, even mugs and plates.
Copyright 2000 Colleen Moulding
Ярлыки:
background,
camera,
children,
family photography
Sunday, February 17, 2008
Olympic Photocross
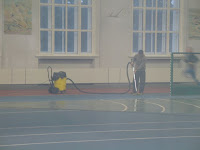
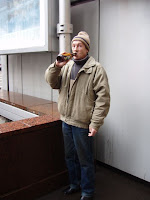
On this photocross such themes as have been presented: "180 impacts in a minute", "Prepared for Olympiad", "Cross-man has believed in dream", "Lifeless season", "To look at world through the eyes of ...", "Not invented kinds of sports", "New philosophy of sports", "Pleasure of a body", "At me on physical culture a bad mark", "Homestretch", "Self-portrait".
"180 impacts in a minute"


"Prepared for Olympiad"


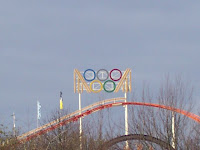
"Cross-man has believed in dream"


"Lifeless season"


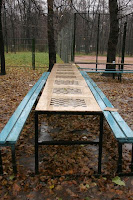


"To look at world through the eyes of ..."


"Not invented kinds of sports"

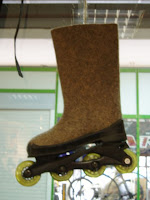


"New philosophy of sports"

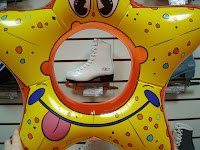


"Pleasure of a body"
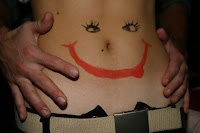
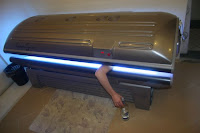

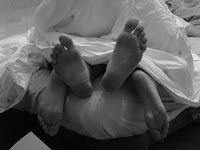
"At me on physical culture a bad mark"



"Homestretch"


"Self-portrait"


"180 impacts in a minute"


"Prepared for Olympiad"


"Cross-man has believed in dream"


"Lifeless season"


"To look at world through the eyes of ..."


"Not invented kinds of sports"


"New philosophy of sports"


"Pleasure of a body"


"At me on physical culture a bad mark"


"Homestretch"


"Self-portrait"


Subscribe to:
Posts (Atom)